
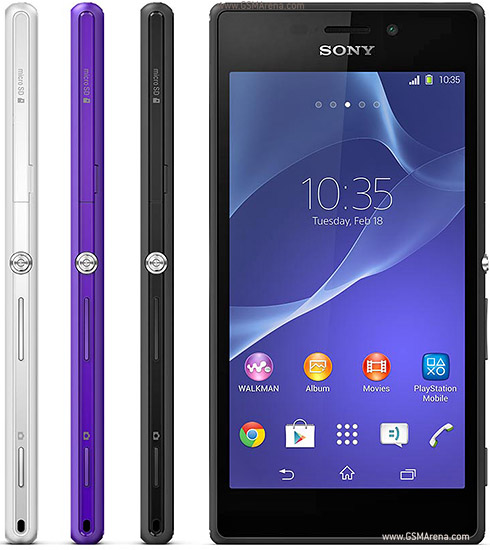
Sony Xperia M2 Specifications


| GENERAL | 2G Network | GSM 850 / 900 / 1800 / 1900 - all models |
|---|---|---|
| 3G Network | HSDPA 850 / 900 / 2100 - D2303 | |
| HSDPA 850 / 1700 / 1900 / 2100 - D2306 | ||
| HSDPA 850 / 900 / 1900 / 2100 - D2305 | ||
| 4G Network | LTE 800 / 850 / 900 / 1800 / 2100 / 2600 - D2303 | |
| LTE 700 / 1700 / 2600 - D2306 | ||
| SIM | Micro-SIM | |
| Announced | 2014, February | |
| Status | Available. Released 2014, May |
| BODY | Dimensions | 139.7 x 71.1 x 8.6 mm (5.5 x 2.80 x 0.34 in) |
|---|---|---|
| Weight | 148 g (5.22 oz) |
| DISPLAY | Type | TFT capacitive touchscreen, 16M colors |
|---|---|---|
| Size | 540 x 960 pixels, 4.8 inches (~229 ppi pixel density) | |
| Multitouch | Yes, up to 4 fingers | |
| Protection | Corning Gorilla Glass 3 |
| SOUND | Alert types | Vibration; MP3 ringtones |
|---|---|---|
| Loudspeaker | Yes | |
| 3.5mm jack | Yes |
| MEMORY | Card slot | microSD, up to 32 GB |
|---|---|---|
| Internal | 8 GB, 1 GB RAM |
| DATA | GPRS | Up to 107 kbps |
|---|---|---|
| EDGE | Up to 296 kbps | |
| Speed | HSDPA, 42 Mbps (D2303, D2306)/ 21 Mbps (D2305); HSUPA, 5.76 Mbps; LTE, Cat4, 50 Mbps UL, 150 Mbps DL | |
| WLAN | Wi-Fi 802.11 a/b/g/n, dual-band, Wi-Fi Direct, DLNA, Wi-Fi hotspot | |
| Bluetooth | v4.0, A2DP, apt-X | |
| NFC | Yes | |
| USB | microUSB v2.0, USB On-the-go, USB Host |
| CAMERA | Primary | 8 MP, 3264 x 2448 pixels, autofocus, LED flash, check quality |
|---|---|---|
| Features | Geo-tagging, touch focus, face/smile detection, HDR, panorama | |
| Video | 1080p@30fps, HDR, check quality | |
| Secondary | VGA, 480p |
| FEATURES | OS | Android OS, v4.3 (Jelly Bean), planned upgrade to v4.4.2 (KitKat) |
|---|---|---|
| Chipset | Qualcomm MSM8926 Snapdragon 400 (D2303, D2306) Qualcomm MSM8226 Snapdragon 400 (D2305) | |
| CPU | Quad-core 1.2 GHz Cortex-A7 | |
| GPU | Adreno 305 | |
| Sensors | Accelerometer, proximity, compass | |
| Messaging | SMS (threaded view), MMS, Email, IM, Push Email | |
| Browser | HTML5 | |
| Radio | FM radio with RDS | |
| GPS | Yes, with A-GPS, GLONASS | |
| Java | Yes, via Java MIDP emulator | |
| Colors | Black, White, Purple | |
| - ANT+ support - SNS integration - Active noise cancellation with dedicated mic - MP4/H.263/H.264 player - MP3/eAAC+/WAV player - Document viewer - Photo viewer/editor - Voice memo/dial - Predictive text input |
| BATTERY | Non-removable Li-Ion 2300 mAh battery | |
|---|---|---|
| Stand-by | Up to 588 h (2G) / Up to 633 h (3G) | |
| Talk time | Up to 13 h 25 min (2G) / Up to 14 h 36 min (3G) | |
| Music play | Up to 58 h 25 min |
| MISC | SAR US | 0.70 W/kg (head) 1.13 W/kg (body) |
|---|---|---|
| SAR EU | 0.77 W/kg (head) 0.78 W/kg (body) | |
| Price group |  |
Disclaimer. We can not guarantee that the information on this page is 100% correct. Read more
Mr. DooMLoRD, XDA recognized developer has released a working root procedure for the Sony Xperia M2 running on Android 4.3 Jelly Bean on Firmware 18.0.A.1.30 – v01. You can easily root your phone and install ClockworkMod recovery. Follow the step-by-step guide explained below to get rooted.
Warning!! Root at your own risk. we and the developer takes no responsibility, if in case you damage your device. Note that the tutorial has been tested and is confirmed working on the Sony Xperia M2.
Requirements:
- Rooting guide is only for the Sony Xperia M2 running on Android 4.3 Jelly Bean.
- Make sure that you’ve already Unlocked Bootloader on your phone. Unlock Bootloader Here
- Install USB drivers on your PC.
- Go to Settings > Developers Options and enable USB debugging.
- Charge your phone battery up to 6o% in order to avoid uncertain shutdown during the rooting process.
- Carefully read and follow the instructions

Download the required Files:
Procedure: Installing CWM Recovery
STEP 1: First download the kernel image from the above download links.
STEP 2: Extract the Fastboot folder (Android.rar) and Copy the kernel image file. (Rename it to boot)

STEP 3: Within the folder, Hold the SHIFT Key + Right click on the blank area and select the option “Open command window here”.

STEP 4: Now boot your Xperia M2 to recovery mode:
- Power off your phone
- Turn it again and when you see the Sony boot logo, keep pressing the Volume Down key.
- Connect it to PC via the USB cable.
STEP 5: In the command window type the following to flash the kernel:
fastboot flash boot boot.img
STEP 6: When flashed, type this command to reboot your phone:
fastboot reboot
You’ve now successfully installed CWM Recovery. To get root Xperia M2 follow the furtherinstructions below.
Procedure: Rooting Sony Xperia M2
STEP 1: First download the SuperSU zip file from the above download link and Copy it to your SDcard.
STEP 2: Reboot your phone into Recovery Mode as you did in the early steps.
STEP 3: Choose the option “Install Zip” > “Install Zip from SDcard” and browse SuperSU zip file.

STEP 4: Confirm to flash.
STEP 5: When done, navigate back to the menu and choose the option “Reboot system now”.
Cheers!! You’ve now safely and successfully got root access as well as installed CWMrecovery. You can easily install Custom ROMs, Tweaks and mods on your phone to improve its overall performance. Do not forget to leave your feedback and share your experience. If you’re having queries or confused at any step, feel free to ask for further support and assistance. For more Rooting Guides keep visiting
How to Install Custom ROMs
- First of all, Creat backup of your current rom.
- download the proper update file for your mobile on computer.
- Optional: download the Google apps package if it is not included on the firmware file.
- Save the files on desktop; don’t unzip them.
- Then, connect your handset with the computer.
- Establish the connecting by using the USB cord.
- Copy-paste or drag and drop the downloaded files from desktop to your phone’s (tablet’s) SD card.
- Disconnect the devices by unplugging the USB cable.
- Turn off your smartphone / tablet and wait a few seconds.
- Then reboot your gadget into recovery mode.
- Next, navigate through the recovery mode menu and select “wipe data factory reset”, “wipe cache partition” and “wipe dalvick cache”.
- The system will now be wiped out, so that’s why the backup has been recommended before.
- Up next, return to recovery main menu: select “+++go back+++”.
- And choose “install zip from SD card” and “choose zip from SD card”.
- Pick the update file and flash the same.
- Optional: repeat this operation for applying the Google Apps package.
- When the installation process ends, from recovery select “+++go back+++” and “reboot system now”.
- You are done.
Troubleshooting:
In some cases after flashing the custom ROM, when rebooting the first time, your handset might get stuck in a boot loop (if the first boot takes longer than usual, don’t panic, there is nothing wrong with your device); if that happens, follow:
- Reboot in recovery once more.
- From there select “wipe data factory reset” and “wipe cache partition”.
- Return and reboot.
- Optional: if needed now you can restore the previous software So, use the recovery menu and select “backup and restore”.
- For resolving any other issues or problems use our dedicated step by step guide.
Post a Comment